Friday 22 March 2013

Challenge #28 Fairies - Delicious Doodles

Hello all well it's that time again over at Delicious Doodles Challenges 
This weeks challenge is 
Fairies

So for this challenge I have used the Mushroom Fairy image 


I started off by printing off my Mushroom Fairy image, and used my Promarkers to colour her in, the colours I used are: Tan, Purple, Berry Red, Poppy, Sky Blue, Cinnamon and Saffron. Once I had finished colouring her in I then picked my background papers, here I have used the Enchanted papers, I stuck these onto a blank scalloped square card, I then cut out my image and placed her in the centre of the second paper using 3d foam pads.

After I cut the bottom half off, another sheet of the second layer paper and double up the 3d foam pads and placed this over my image. Now I needed to add the finishing touches do i went for the flourish die cut, Martha Stewart butterfly punch, and some mulberry paper roses to finish it all off.

I hope you will come and join us in yet another fun challenge at Delicious Doodles, for your chance to win FIVE, yes Five of Teri's fabulous images.

Kelly xx

Saturday 16 March 2013

New Venture

Hello all, firstly I do apologise for not posting sooner, but I have had alot going on this week with 3 lots of bad news so I haven't been able to do much with cards, but I will be posting very soon with some new card creations, as I will be working on some orders tomorrow (Sunday) and also will be working on my next DT card for Delicious Doodles.

Anyways I wanted to share with you what I have been doing, I wanted to try my hand at making Hair Accessories for kiddies but will also be doing them for adults in due course, so I took the plunge watched some tutorials ordered some stock and away I went, I have even set up a business page on facebook which is 

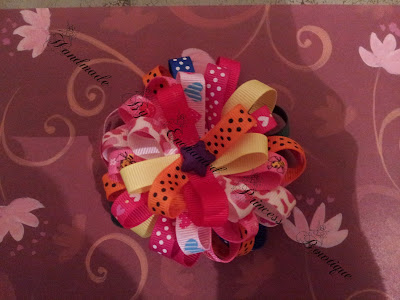
So here we go my first make was this Loopy Flower Bow Clip
made with a mixture of different grosgraine ribbons


My second make again was a Loopy Flower Bow Clip
this time with baby feet grosgraine ribbon in different colours 


By this time of making these two I was realising how much I hate glue guns grrr lol oh and to top it off stabbed my fingers a fair few times with a sewing needle :(

Then I thought I would try a different bow so here we have a
Minnie Mouse Spike Bow


Now I wanted to try another different style so here we have a Pony O

And lastly I made two sets of hair clips a Hello Kitty set and a Minnie Mouse head set


I hope you like what I have made :) I have really enjoyed making these and I hope you take the time to take a look at my facebook page, as I will have alot more to come. But for now I am just getting everything ready for my customer orders of cards and personalised easter bunny letters so then they can all be posted off on Monday :)

Kelly xx


Monday 11 March 2013

St Patricks Day

Hello all, well as some of you have seen on Facebook on the Delicious Doodles group I mentioned that I had been playing with some of the new release images lol,  Well I have kept you all waiting long enough so here is the first lot.

For this card I have used

I started off by printing all my images out I then started to colour them in with Promarkers, the colours I have used are:
Celtic Fairy
Skin: Oatmeal, Saffron, Putty and Soft Peach
Hair: Holly and Grass
Wings: Meadow Green and Emerald
Top: Soft Green
Shamrock Corner
Grass and Emerald
Celtic Cross
Meadow Grass, Grass, Emerald and Holly

Once I had finished colouring in these images, I then added glitter glue to the hair wings and Shamrock's and the die cut flourish, while it was drying I chose my backing papers I went for  a light green backing card, then a darker green spotted backing paper and the third layers is a glittered green card,I cut all layers to the required size I wanted. I then rounded off the corners with my corner punch on the spotted layer and the glittered card, I then began to layer up my papers and glue them down onto a blank 8x8 card.

Now all my papers were layered and glued, I then started to do my layout with my images and a die cut flourish as by now the glitter glue was dry, once I was happy with the layout of it all I glued all the images into place and the die cut flourish.

I would like to enter this into the following challenges 


xx Kelly xx


Sunday 10 March 2013

Delicious Doodles Competition Time

Hello all, over at Delicious Doodles Blog and Facebook Group, 
Teri is running another Name That Image competition
If your name for the image gets picked you win the image for FREE!!
How cool is that and here she is 


So what are you waiting for get your (clean) suggestions in and you could be the lucky winner of this wonderful image, You can leave your suggestions either on the blog or the facebook group

you only have until Tuesday at noon (UK time)

Good Luck and Have Fun xx

Friday 8 March 2013

New Project

Hello all I hope everyone is ok, me on the other end am now :( my fibromyalgia is playing up today and I am still not sleeping right at night I was up all last night, finally managed to get to sleep at about 10am this morning. So because I couldn't sleep last night I had a brain wave, well I had an empty box frame on my desk and alot of 3D Decoupage and die cuts so the brain started to kick over and I was thinking I wonder, so I put it to the test and well it does work and looks very effective. I am even going to try it by colouring in some of digital images and making them 3D also for the frame.

So now I bet your dying to know how they look - Well I will warn you all this is going to be a long post as i sort of erm got carried away, im sure many of you know what that is like it just can't be helped lol.
So here they are 

This one is a 3D Fizzy Moon Decoupage it was really simple i just made up the decoupage with 3d foam pads, then measured out the backing paper/card and stuck the image to it and then placed into the frame, This one shows with no mount

This one shows the same picture but this time with the mount around it 


Again this one is a 3D Fizzy Moon decoupage made in exactly the same way as above first picture shows without the mount


This one shows with the mount


Now this one is just a die cut silhouette which I gained through a bit of a craft swap, all i have done here is taken a white silhouette for the front and a black one for behind to give it a shadow


Here I have taken 2 different sized Butterfly die cuts with acetate on the back of the wings and clued these onto some backing paper, The butterfly's have actually been placed so they look 3D and coming away from the backing paper


For the fairies I just again did the same I did with the Fizzy Moon, these Fairies come from the Enchanted Range


So as you can see yes I got very carried away I was still making these around 2-3am this morning, I have really enjoyed doing these as they are something completely different and look amazing the pictures really do not do them justice.

I hope you like my new project I found myself doing while I couldn't sleep etc 

Kelly xxx


Delicious Doodles Challenge #26 Use Die Cuts

Hi all well its that time again its challenge time over at
Delicious Doodles Challenge Blog and its Team B's Turn

Challenge #26 Use Die Cuts

Well this is my first challenge inspiration make as a proud DT member 


I first picked my image i wanted to use resized it and then printed it off, once it was printed off I then used my Spellbinders Nestabilities die cut to cut the image out, once i had done this I then started to colour it in using my Promarkers, the colours i have used are: Burnt Umber, Purple, Cocoa, Putty, Oatmeal, Blush, Cool Aqua, Poppy, Amethyst, Grass, Emerald and Warm Grey 3.

Now the image is all coloured I then used my Tim Holtz Tumbled Glass Distress Ink to do the edges. I then concentrated on some more die cuts which are the Memory Box Blossom, Vintage Butterfly, and Flourish. Next I choose my background papers which are the Rose and Thistle Papers, I printed these off and cut them down to the size I required.
Once i had done all this I then made up my blossom and started to put things together by placing them in different ways until i was happy once I was happy with it I glued it all down onto a blank A5 card, for the finishing touches I added two red feathers and some diamante's.

You can see more of Team B's inspiration pieces on the Delicious Doodles Challenge Blog and you can find out how to take part too

I would like to enter this card into the following challenges 
The Paper Shelter - Punches and Dies 
Hobby Cutz - Anything Goes
Natalie and Amy - DieCuts
No Matter Which Challenge - Anything Goes
4 Crafty Chicks - Die for Dies

Kelly xxx

Thursday 7 March 2013

Get Well Soon Card

Hello all from a cold and damp Stoke-On-Trent, well the other half is busy working on a car, so I thought I would have a bit of me time and make a new card, well I should say I was only supposed to colour a digi image in, but couldn't leave it at that so turned it into a card :) while i'm watching Sons Of Anarchy hehe.

The image I have used on this card is Lily and Butterfly by Delicious Doodles 


I started off by choosing my digi image, I also added the Sentiment Get Well Soon, I did this on publisher and then printed it off. Now for the colouring I was going to do the Lillie's all one colour but then decided to go for different colours, I coloured the image in using promarkers.
The colours I used for the Lillie's are: Tulip Yellow and Gold, Cerise and Magenta, Sky Blue and Azure, and the last one is Orchid and Purple. For the buds of the Lillie's I used Grass and Meadow Green. The butterfly I used: Hot Pink, Turquoise, Cobalt Blue, Pumpkin and Warm Grey 3. The frame I used: Poppy

Now it's all coloured I looked at it and thought this needs to be made into a card. So i took a blank 8x8 card choose my backing papers and card and cut these to size, I then used my edge cutter to round off the edges on the second and third layer. After I took two different strips of backing paper and cut these to size and I used my Big shot machine to use one of my die cuts for the butterfly then I cut out my digi image.

Once all this was done I layered it all up bit by bit till I was happy with the layout, once i was happy with the layout I then stuck it all down using Anita's tacky glue and double sided tape. To finish it off I added a red feather some mulberry paper roses the butterfly and some diamantes.


Kelly xxx

Wednesday 6 March 2013

Exciting Times!!!

Hello all well the news I wanted to share with you all that I mentioned yesterday is about the Delicious Doodles DT Call that I applied for well I can now announce that 

I am now a Delicious Doodles DT Member 

I haven't been able to mention it for a few days but now I can. Been in shock tbh for the last few days too but it is slowly sinking in now, I can't wait to get stuck in I am so proud that i have been given this opportunity to work alongside some wonderful talented ladies, but most of all I would like to thank Teri for giving me this opportunity


And my first DT make will be up very soon as the next challenge will be announced on Friday

Kelly xxx

Tuesday 5 March 2013

Mother's Day

Hello all well I have been very busy working on a custom order :). I will also have some very exciting news to share with you all tomorrow so keep your eyes open for that aswell.

So here is the card i have been busy making for a customer who is also a very good friend of mine 


The image i have used is one of Delicious Doodles called Rose and Butterfly 1, I first resized the image to what I needed it to be and then printed it off once it was printed I then coloured it in using promarkers the colours I used were: Cerise, Hot Pink, Magenta, Grass, Emerald, Berry Red, Azure and Purple. Once this was all coloured in I then cut it all out, now I started to concentrate on the card it self, so i drew around the templates i purchased to make the box and the card, and then decorated the box with border peel off stickers and the same with the card edges.


I then made the box up and let this set, while that was drying I started to decorate the front of the card by sticking the image down in the centre with double sided tape, I then added a bow at the bottom and two pink feathers at the top. I then attached the box to the side and added a flower at the bottom and a butterfly to the top.

The box has been left empty as the customer is going to put chocolates into it for her mum :)

I would like to enter this into the following challenge 

Kelly xx

Friday 1 March 2013

Just For You

Hello all well its that time again over at Delicious Doodles - This weeks challenge is 


So here is my challenge entry 


Here is how I made it, Firstly I chose my delicious doodles image which is the Lily and Butterfly, I resized it to the size I required and then printed it off. I then printed off my template which I purchased cut this all out I then drew around my template onto high quality thick card, once this was done I then cut it out and scored where I needed to. 
After i had done all the cutting and scoring I decorated the box using border peel off stickers, and two mulberry paper roses then made up the box (which is on the side of the card) and glued it all together. I then started to concentrate on colouring my image while the box was drying, I coloured the image in with Promarkers the colours I used are:
Tulip Yellow,Gold, Buttercup, Soft Green, Soft lime, Hot Pink, Orange, Magenta, Maroon, Warm Grey 3 and Cool Aqua.


Once it was all coloured in I cut the image out. Now I could decorate the front of the card, so again I used border peel off stickers around the edges then I stuck my image down in the centre, and added mulberry paper roses in the corner, along with a yellow bow in the top corner and two yellow feathers lastly I added my sentiment.
Now all I needed to do was to put some tealight candles into the box and then stick the box onto the side of the card. Now it's all complete :) 


Kelly xx